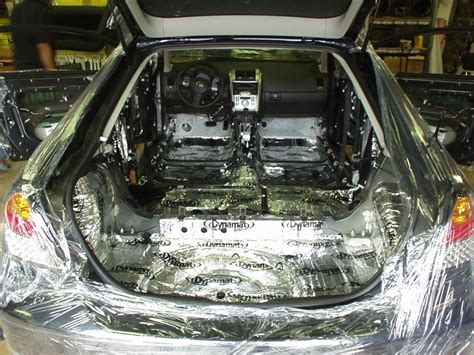
How To Remove Dynamat
Ronan Farrow
Apr 02, 2025 · 3 min read

Table of Contents
How to Remove Dynamat: A Step-by-Step Guide
So, you've decided to remove your Dynamat. Whether you're upgrading to a different sound deadening material, prepping for repairs, or simply removing it for aesthetic reasons, this guide will walk you through the process safely and efficiently. Removing Dynamat can be a little challenging, but with the right approach, you can do it without damaging your vehicle's interior.
Tools You'll Need
Before you begin, gather these essential tools:
- Plastic pry tools: These are crucial for gently lifting edges of the Dynamat without causing damage. Avoid using metal tools, which can easily scratch your surfaces.
- A heat gun (optional but highly recommended): Heat significantly softens the adhesive, making removal much easier. A standard hairdryer can work in a pinch, but a heat gun is faster and more effective.
- Putty knife (plastic or metal): A plastic putty knife is gentler on surfaces, but a metal one might be needed for stubborn areas. Use caution to avoid scratching.
- Gloves: Protect your hands from the adhesive.
- Shop towels or rags: These will be essential for cleaning up the adhesive residue.
- Adhesive remover (optional): If the residue is particularly stubborn, an adhesive remover can help. Choose one specifically designed for automotive applications.
Step-by-Step Removal Process
1. Prepare the Area:
- Clean the area you'll be working on. Dust, dirt, and debris can complicate the removal process.
2. Apply Heat (Recommended):
- If using a heat gun, set it to a medium heat setting. Never hold the heat gun in one place for too long, as this can damage the underlying surface. Move it constantly across the Dynamat.
- The goal is to soften the adhesive, making the Dynamat pliable and easier to peel away.
3. Start Peeling:
- Using a plastic pry tool, carefully insert it under a corner of the Dynamat. Gently pry up a small section.
- Once you have a small section lifted, slowly and steadily peel back the Dynamat. Work slowly and patiently to avoid tearing it.
4. Tackle Stubborn Areas:
- If you encounter areas that are particularly stubborn, reapply heat and use a putty knife to gently loosen the adhesive. Again, use caution to prevent scratches.
5. Clean Up the Residue:
- Once all the Dynamat is removed, you'll likely have adhesive residue remaining. Use shop towels or rags to clean up as much as possible. For stubborn residue, apply an appropriate adhesive remover, following the manufacturer's instructions.
6. Final Cleaning:
- After removing the residue, wipe the area clean with a clean, damp cloth to ensure all traces of adhesive are gone.
Tips for a Smooth Removal
- Patience is Key: Rushing the process can lead to damage. Take your time and work methodically.
- Less is More: Use minimal force. Excessive force can damage your vehicle's interior.
- Protect Your Surfaces: Use appropriate tools and techniques to avoid scratching or damaging underlying surfaces.
- Ventilation: Work in a well-ventilated area, especially when using a heat gun or adhesive remover.
By following these steps and using the right tools, removing your Dynamat should be a relatively straightforward process. Remember safety and patience are key to a successful and damage-free removal. Good luck!
Featured Posts
Also read the following articles
| Article Title | Date |
|---|---|
| How To Replace Carpet On Boat Trailer Bunks | Apr 02, 2025 |
| How To Stop License Plate Rattle | Apr 02, 2025 |
| How To Restore Cedar Wood | Apr 02, 2025 |
| How To Store A Sabiki Rig | Apr 02, 2025 |
| How To Remove Ecm Connector | Apr 02, 2025 |
Latest Posts
Thank you for visiting our website which covers about How To Remove Dynamat . We hope the information provided has been useful to you. Feel free to contact us if you have any questions or need further assistance. See you next time and don't miss to bookmark.
